Core Portal FAQ's

Core Portal - General - How do I Register to use the system

Core Portal - General - How do I Register to use the system
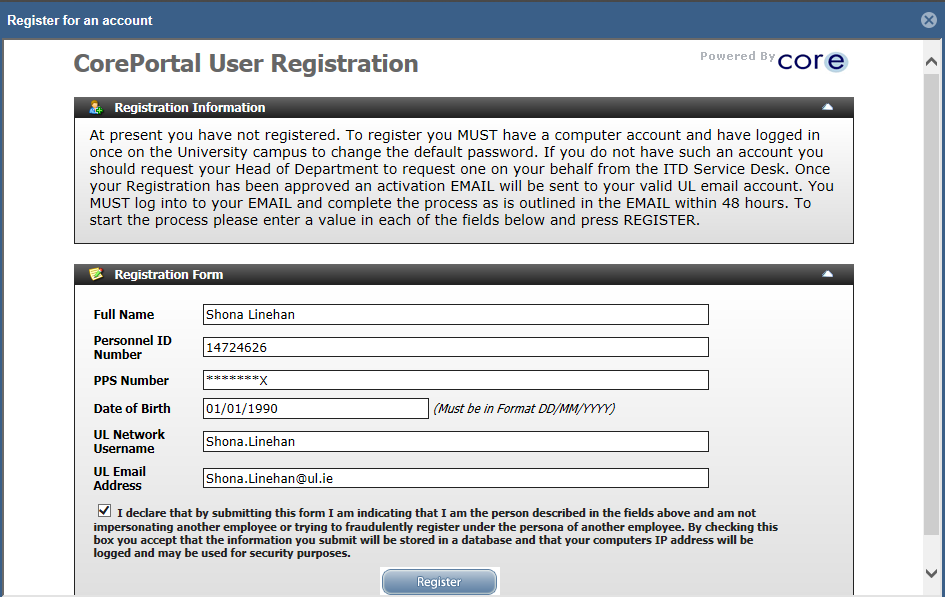
When you are registering for Core Portal you will be faced with the screen as show below in which you need to enter your personal details:
• Staff Registration Page

Click Register once you have all information filled in correctly. An email will then be sent to your email address, where you click a link to complete registration.

Hourly Student Registration Page:

* In order to register with Core Portal you must have a current contract with the University and a valid UL network account. If you are a new employee, please refer to the New Employees section of the ITD website.
 

Common Registration Errors

The following are a list of common errors messages received by users registering for Core Portal, and details on how to rectify the problem. 


Error Message 1: Inactive Personnel Number

Registration Failed
 
That personnel number is not currently active on the system. Only active employees can register for CorePortal. 

Employees can confirm their personnel number and their active status with the compensations and benefits section of the HR Division: compandbens@ul.ie. Students can address this query to the Payroll section of the accounts department: salaries@ul.ie. 


Error Message 2:  Incorrect PPS Number 

Error: This must consist of seven digits followed by one or 2 letters
Or PPS Number does not match the PPSN on record for this person. If you think this may be in error, contact your administrator.

Users should first confirm they are entering their correct PPS number. Employees can confirm the PPS Number the system holds for them with the compensations and benefits section of the HR Division, compandbens@ul.ie . Students can address this query to the Payroll section of the accounts department salaries@ul.ie . 


Error Message 3: Incorrect Date of Birth

Date of Birth does not match the Date of Birth on record for this person. If you think this may be in error, contact your administrator.

Or Error: This must be a valid date (DD/MM/YYYY)

Users should first confirm they are entering their Date of Birth in the correct format (DD/MM/YYYY). Employees can confirm the Date of Birth the system holds for them with the compensations and benefits section of the HR Division compandbens@ul.ie . Students can address this query to the Payroll section of the accounts department salaries@ul.ie . 


Error Message 4: Invalid AD Account

The Windows Username you supplied is not a valid AD account.

Users should first confirm they are entering their username in the correct format; employees’ username is normally ‘firstname.lastname’ unless they are advised otherwise. The username format for students is ‘studentnumber’. Employees and students can confirm that they have a valid AD account by logging a call with ITD. New employees should also ask the relevant admin person in their department if they have received a username and e-mail account.


Error Message 5:  Invalid Email Address

The Windows Username/Email Address you supplied did not validate against your Active Directory account. Please contact your Network Administrator.

Or Error: You must enter a valid email address

Users should first confirm they are entering their username in the correct format, ‘firstname.lastname@ul.ie’ for employees or ‘studentnumber@studentmail.ul.ie’ for students. If you are still having difficulty you should log a call with the ITD service desk (http://inside/itdservicedesk/).  

Error Message 6: Declaration agreement not ticked

Error: You must agree to the declaration

Users must ensure that they tick the box at the bottom of the page to agree to the declaration.

After you complete the registration page

Once you have registered, an email will be generated and sent to your valid UL email account outlining the next steps in the process.  You may activate or cancel your registration at this point. You must activate your registration within 48 hours.
Core Portal - General - How to Add Dependants

Core Portal - General - How to Add Dependants

To add dependants, log into your Core portal.

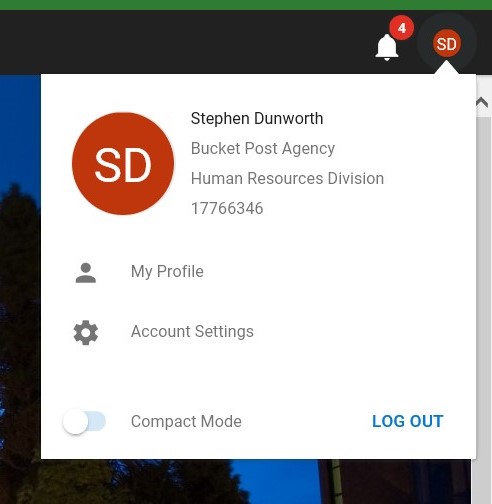
On the top right, click on your initials and click My Profile


This will bring you to a new screen with a menu on the left. Under Employee Detail, click Dependants.


Click Add, enter the details and Save.

Core Portal - General - I can't log in

Core Portal - General - I can't log in
  • You access the system using your UL network username (firstname.lastname) and password.  Please do not use your email address.
  • You will be locked out of the system after entering your details incorrectly three times.  Please contact the ITD Service Desk to have your password unlocked.

If your query has not been answered in the above documents please contact the ITD Service Desk or contact CorePortalEmail@ul.ie.

Core Portal - Pension - Where can I find information relating to my pension?

Core Portal - Pension - Where can I find information relating to my pension?

In this section, you can view and amend many of your pension related details; including dependent and next of kin details. You can also view your personal pension record and use the pension calculator to model your future pension entitlements.

For further information on viewing your pension, related details please see the following document link - Using Core Portal Pension Calculator

For further information on adding dependents on Core Portal, please see the following document link - Adding Dependents on Core Portal 

For further information on this please view the Pensions section of the HR website, or contact the Pensions section directly, pensions@ul.ie

Core Portal - Timesheet Administrator - Submitting a timesheet

Core Portal - Timesheet Administrator - Submitting a timesheet


1.  Using a PC on the UL Network logon to the Core Portal site.
2.  In the Employee Dashboard, under the Hourly Timesheet Tab, you will see the Admin Timesheets Widget.


3.  Click Add, a new screen will appear


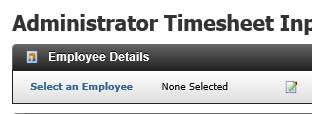
4. Select an employee that you are submitting the time sheet on behalf of. A new pop up will appear with a list of staff within your department


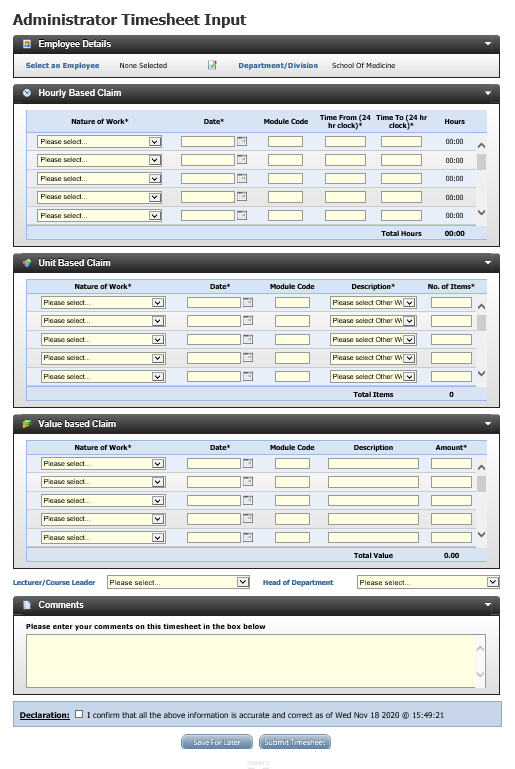
5. Please only enter Hourly Based Claim’s.  Enter the following details: select the ‘Nature of Work’, ‘Module Code’ (Where relevant- this is an optional field), ‘Date’, ‘Time from’ and ‘Time To’. Note: 24hr format is required for entering time e.g. for 7am 0700 for 7pm 1900.


6. Select the ‘Lecturer/Course Leader’ and ‘Head of Department’.


7. Tick the declaration checkbox to confirm the information entered is correct and accurate and if necessary enter a comment for the approvers. At this stage, you may save the timesheet for later or submit it to the approvers. An e-mail will be sent to the Approver notifying that a timesheet is waiting for their approval.


A message will be displayed, to let you know the timesheet has been submitted for approval. Click the close window button. 


Core Portal - Timesheets - How can I nominate or remove an Approver ?

Core Portal - Timesheets - How can I nominate or remove an Approver ?

Nominating an Approver 

Log into Core Portal. After logging into the Core Portal site, you will land on the Manager Dashboard.

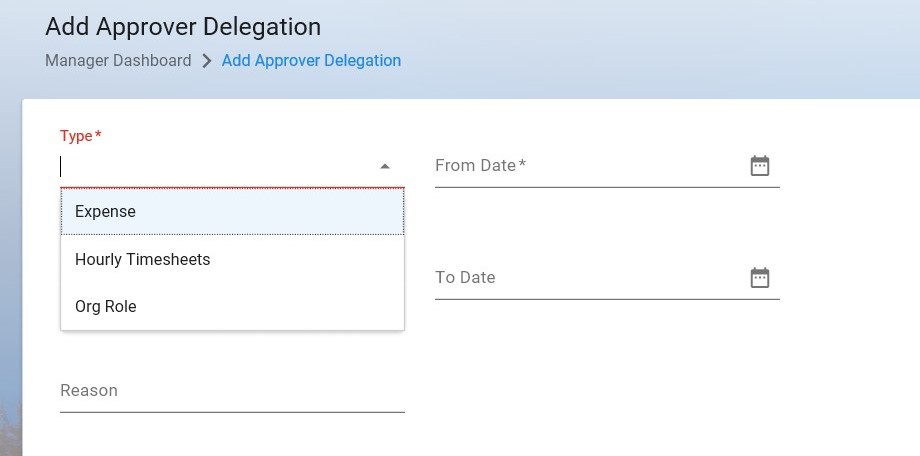
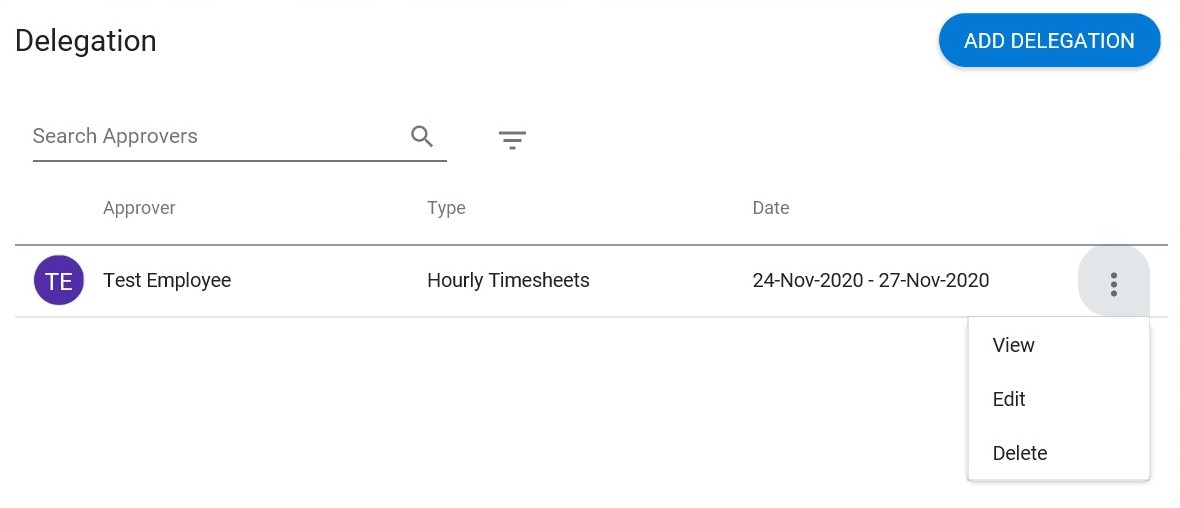
On the Delegation Widget, click Add Delegation. A new screen will pop up.  Select Hourly Timesheets for Type. If you are a first approver, you will delegate first approver privileges and likewise for second approver.


Select the date you want the delegation to run to and select the employee in question.

Ensure the authorization box is ticked. Click save.


Removing an Approver 

Return to the Delegation widget. You will see your delegated employee appearing on the list. To edit or delete the delegation, simply click the button with three dots and select your choice.


Save and  Exit. This may take up to 1 hour to take effect on the system.

Core Portal - Timesheets - How do I approve/reject claims (Approver 2)?

Core Portal - Timesheets - How do I approve/reject claims (Approver 2)?

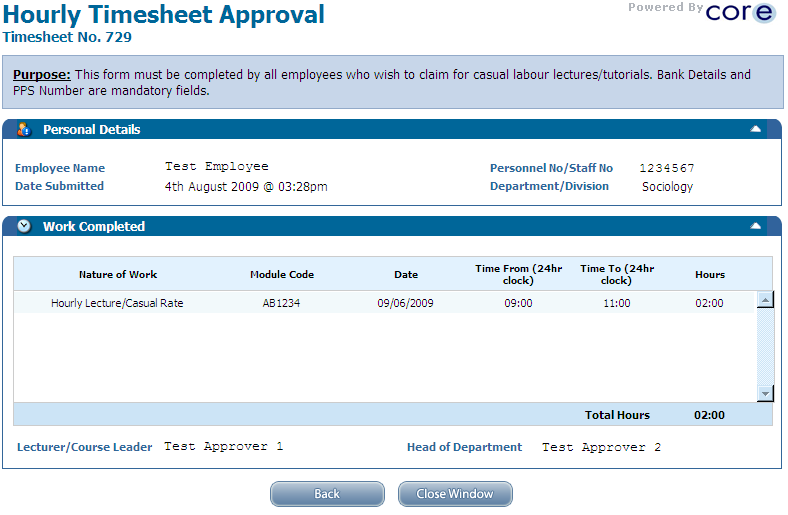
On the ‘Hourly Timesheet Approval’ page, if the details of the timesheet are satisfactory then you must select the pay rate, cost centre and account number before approving the timesheet(see screen-shot below).

HR CORE - TIMESHEETS - HOW DO I APPROVE/REJECT CLAIMS APPROVER 2
SCREENSHOT - Core Portal - Timesheets - How do I approve/reject claims (Approver 2)?


Core Portal - Timesheets - How do I approve/Reject Claims?

Core Portal - Timesheets - How do I approve/Reject Claims?

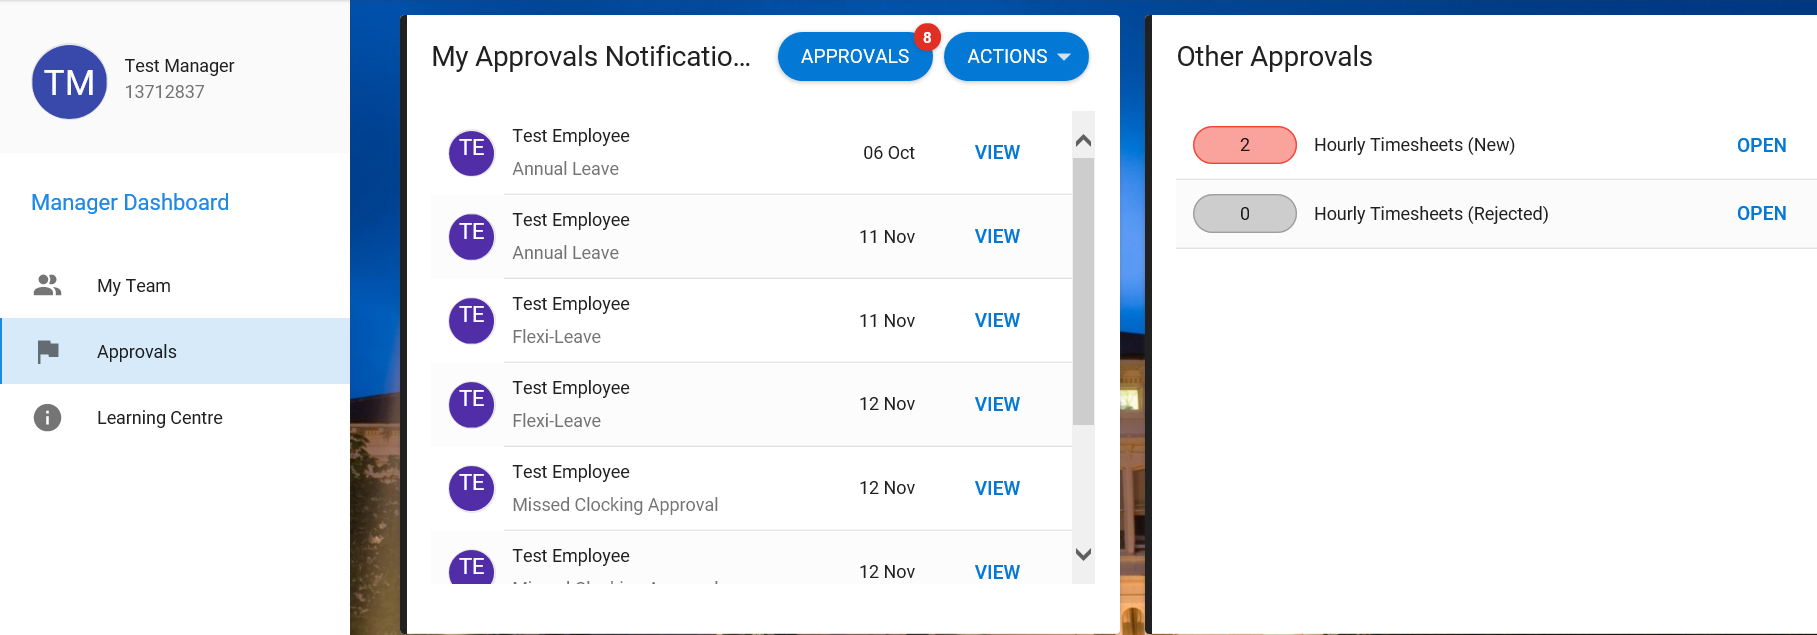
1. In the Manager Dashboard, in the Approvals Section, you will see the Other Approvals Widget.

2. Click Open if there are any New Hourly Timesheets ready to be actioned.

3. Select the ‘magnifying glass icon on the ‘Action’ column to display the timesheet claim details screen (‘Hourly Timesheet Approval’).

4. On the ‘Hourly Timesheet Approval’ page, if the details of the timesheet are satisfactory click the ‘Approve’ button to approve the timesheet. To ‘Reject’ the timesheet click the ‘Reject’ button (If you are rejecting a timesheet you will have to state a reason). If you do not see the ‘Approve/Reject’ buttons maximise your screen and scroll to the bottom of it.

5. If the timesheet claim is ‘Approved’ it will go through to the ‘Approver 2 (HoD) ’ for final approval. If the timesheet claim is ‘Rejected’ the claimant (standard user) will be notified by e-mail and can re-submit the timesheet claim if appropriate.