Configuring your settings with the Grades Setup Wizard
Grades Setup Wizard allows you to configure Grades to suit your approach to evaluation. When you access Grades within your course for the first time, the Setup Wizard loads, however if it doesn't, click Setup Wizard tab in Grades. In the Grades tool, if a grade book is not set up or imported for your course, you will see the Grades Setup Wizard page when you first navigate to the tool. Note: If you cannot select the Automatically release final grade option, contact your administrator and request that they grant you permission.
Firstly, enter the Grade Setup Wizard.
1. In the navbar, locate and click Grades.
2. Click the Setup Wizard tab.

3. Click Start.
The following steps are the steps and outcomes as you progress through the wizard. This is a slightly longer process than other steps on this user guide. Therefore, this are broken down into 7 steps with sub-steps within each of them.
Step 1: Choose your Grading System
(a) Decide how you want to calculate your final grade.
-
A weighted grade system relies on categories to carry a percentage of the final grade regardless of how many items are in those categories. However, grade items can also stand alone to represent a percentage of the final grade.
-
Note: If you choose a weighted system, you must apply a weight to each grade category you create.
-
-
A points-based grade system adds up all the denominators of grade items to determine what the course is out of. Grade categories are not necessary but are often used to organize the items and make your gradebook readable.
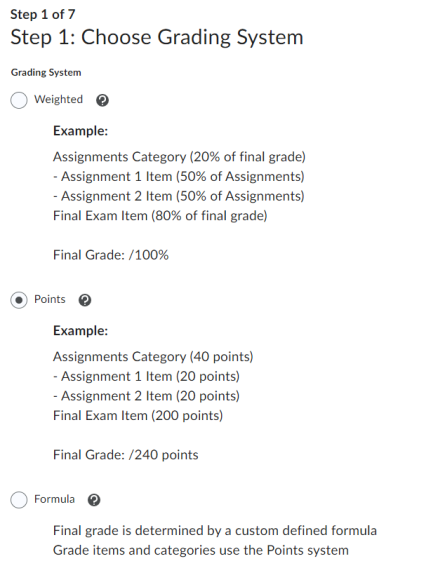
(b) Once you have selected your Grading system, click Continue.
Step 2: Final Grade Released
Overview
When your learners visit Grades, they only have access to a list of grade items within the course that have already been evaluated and published. However, you can control if the final grade will be included in this list or not, and which final grade to show.
(a) Choose one of the two final grades options:
- Calculated Final Grade cannot be directly modified and is automatically updated when new evaluations are completed and published. This is a good option if you want your learners to know their final grade from early on in the course as it will be updated as the learner progresses.
- Adjusted Final Grade is more flexible, where both the numerator and denominator can be edited to suit your needs. However, the Adjusted Final Grade will never update automatically. This is a good option to choose if you wait until the end of the course to show the final grade.
(b) Check Automatically release final grade to show learners their final grade right away without needing to manually release it from Enter Grades.

Note: You can switch the Final Calculated Grade method at any time by returning to the Setup Wizard, or visiting Settings in Grades, This allows you to display the Calculated Final Grade early on, and then switch to the Adjusted Final Grade should you want to modify any grades.
(c) Click Continue.
Step 3: Grade Calculations
Overview
Within your course, you may have grade items that are not graded - this may be in the case of an exemption, or a learner not completing the assessment activity.
(a) Select which option to choose for ungraded items.
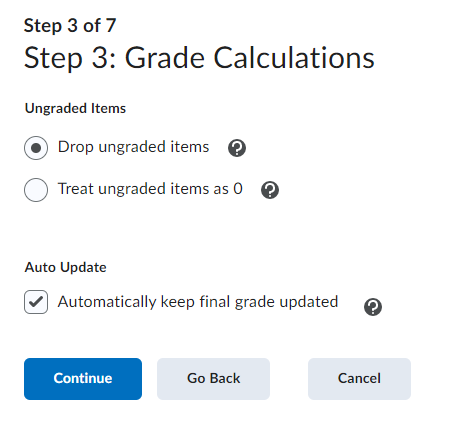
Optional: Decide whether to automatically keep the final grade updated.
Consider the following scenario where a course has learners complete the first of two quizzes:
|
Grade Item |
Score with “Drop ungraded items” |
Score with “Treat ungraded items as 0” |
|
Quiz 1 |
10/10 |
10/10 |
|
Quiz 2 |
-/10 |
-/10 |
|
Final Grade |
10/10 |
10/20 |
(b) Click Continue.
Step 4: Choose Default Grade Scheme
Overview
Grade Scheme allows you to set a default, to attach custom labels or ranges of scores to show in addition or in place of a numerical scheme. These labels can be used to show letter grades or pass/fail terminology. If your institution has not created additional Grade Schemes for you to choose from, D2L has provided a default grade scheme that converts scores into a percentage.
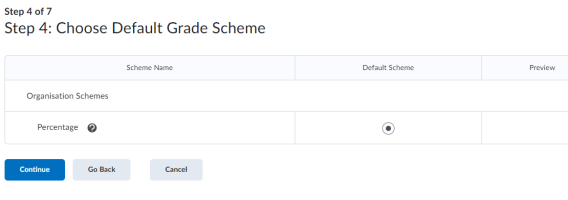
(a) Choose the default grade scheme. (currently only the percentage option is available)
Note: Once you exit the Grade Setup Wizard, you have the option to create your own Grade Schemes.
(b) Click Continue.
Step 5: Managing View Display Options
Overview
As the instructor, you must decide how many decimal places you would like to see in Grades.
Note: Brightspace will round display of numbers.
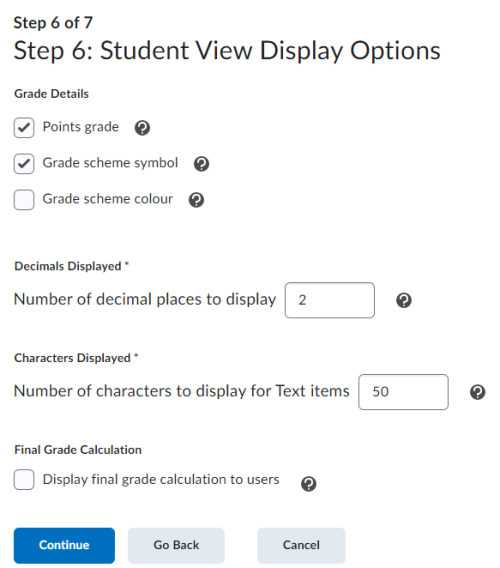
(a) Choose up to four properties to display by default to your learners when they access Grades:
- Points Grade: the numeric score (ex. 8/10)
- Weighted Grade: the numeric score taking into account its weight for the final grade (ex. if a learner scored 8/10 on an assessment worth 25% of the final grade, they would see 20/25). This option is only available if you chose a Weighted Final Grade (Step 1).
- Grade Scheme Symbol: the symbol associated to the range of a score (ex. 8/10 may display as "Excellent" or "A").
- Grade Scheme colour: the Grade Scheme Symbol can display against a colored background.
(b) Click Continue.
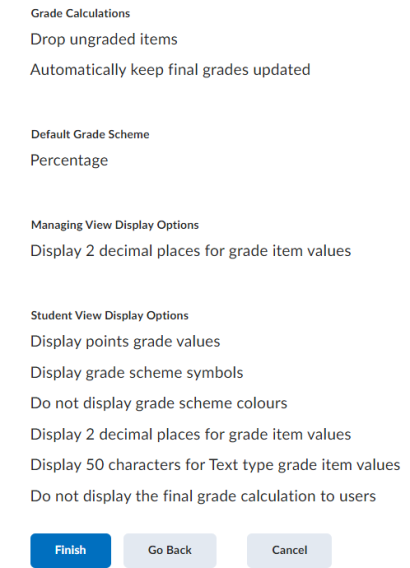
Step 7: Grades Setup Summary
(a) Ensure you have made your preferred selections.
(b) Click Finish to Finalize your gradebook.
Result
The new grade book has been set up and you are now ready to create grade items and categories.