There are a number of ways to add PowerPoint to a module. Presentations which do not include audio/video content may be added to Brightspace using any of the 4 options outlined below. Those with audio/video content should follow the instructions given in section 2.
For PowerPoint presentations without audio/video content
For PowerPoint presentations with audio/video content
- Upload your presentation to OneDrive and embedded it in a unit or page
- Upload your Presentation to Panopto and insert into a content page
1. For PowerPoint presentations without audio/video content
As a first step you should upload your PowerPoint presentation to the Manage Files area of your module (follow the instructions here). You then have 2 options to share that file with your students, either link to that file in text or to create a page in Content for your presentation.
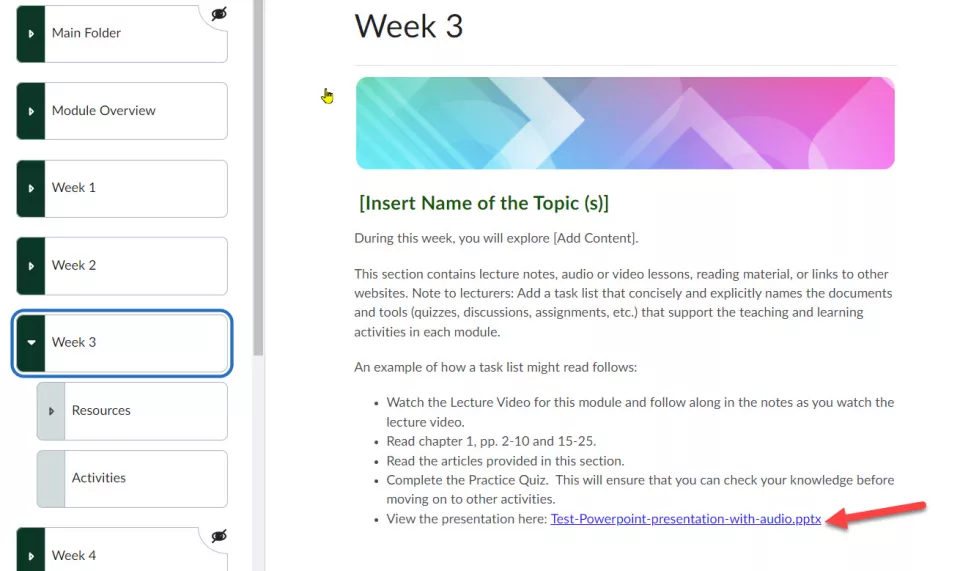
Creating a text link to a PowerPoint presentation
What this looks like:
1. In Content, open the page or unit where you want to place the text
2. Click the edit option to the right of the screen (the ellipsis icon, 3 dots)
3. Place your cursor where you would like the link to be placed on the page
4. Click Insert Quicklink from the toolbar.
5. Click Course File.
6. Select your PowerPoint presentation from the folders displayed.
7. Click Save and Close.
Result
The text link has now been created and is visible on the page.
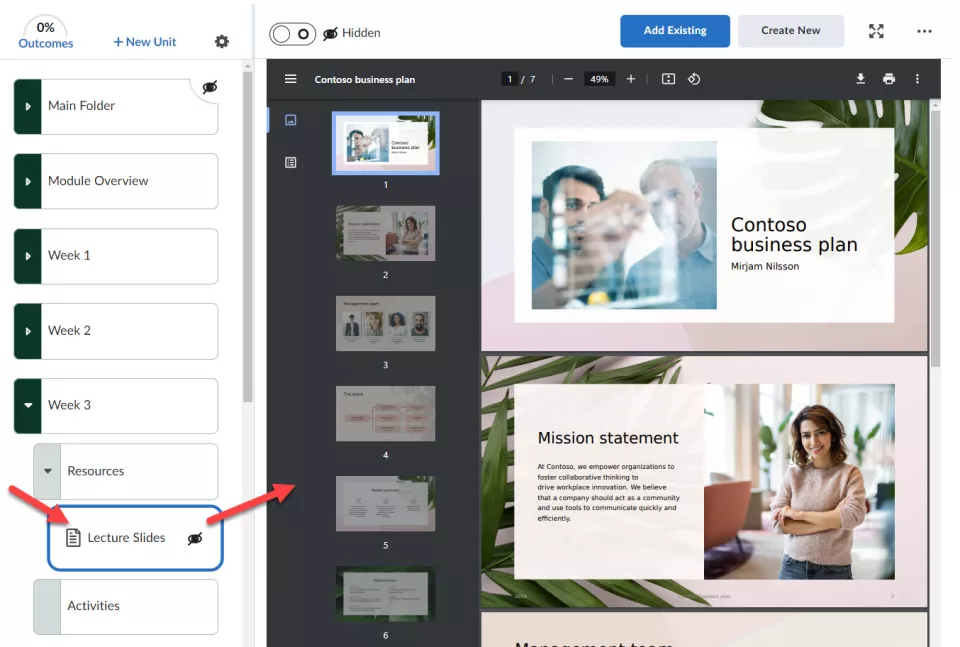
Creating a page in Content to display your PowerPoint presentation
What this looks like:
1. In Content, click on the unit or subfolder where you want to place the page.
2. Click Add Existing.
3. Click More.
4. Click Course File.
5. Select your PowerPoint presentation from the folders displayed.
Result
The page is automatically created with the name of your PowerPoint file. If you wish to rename the page title, click on the Edit option on the righthand side of the screen and rename the page.
NOTE: When a PowerPoint presentation is added as a page within Content, Brightspace converts the PowerPoint file to a PDF. While this may not be an issue for some presentations, it may cause issues for others, particularly those with audio or video included in the presentation.
On uploading your PowerPoint, Brightspace automatically converts the PPTX to a PDF for student viewing but sometimes the text in the PowerPoint does not display correctly when added to your page on Brightspace. If you find that your texted is not displaying correctly in your presentation after adding it to the content are area on Brightspace you can try the following two options –
- Convert the PowerPoint to a PDF and then upload the PDF format to Brightspace. This ensures you that your file is always presented in the right way.
- Upload your presentation to OneDrive and embedded it in a unit or page below (see below). This also ensures you that your file is always presented in the right way. (The share permissions may need to be amended)
2. For all PowerPoint presentations including those with audio/video content
If your presentation contains audio or video, you should choose one of the options outlined below to ensure your presentation is presented with all content intact.
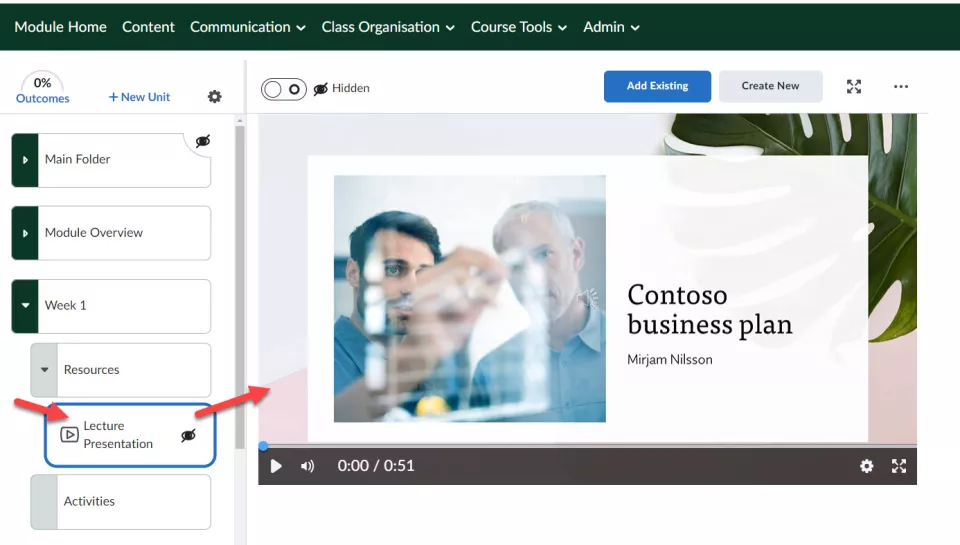
Save your presentation as an MP4 (movie) file and add it as a page in Content
What this looks like:
1. Open your presentation in PowerPoint.
2. Click File at the top left of your screen.
3. Click Export.
4. Click Create a Video.
5. Select your settings and click Create Video.
6. Name the video, choose a location to save, and click Export.
7. Upload the video file to Manage Files in your Brightspace module (follow the instructions here)
8. Click on the unit or subfolder where you want to place the presentation in your Content.
9. Click Add Existing.
10. Click More.
11. Click Course File.
12. Select your PowerPoint presentation from the folders displayed.
Result
The page is automatically created with the name of your PowerPoint file. If you wish to rename the page title, click on the Edit option on the righthand side of the screen and rename the page.
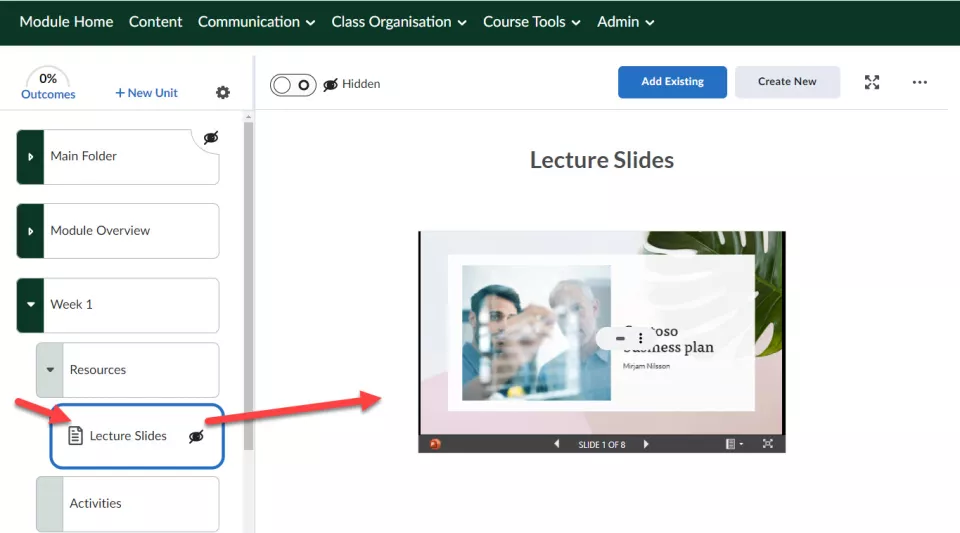
Upload your presentation to OneDrive and embedded it in a unit or page
What this looks like:
This option requires use of the web version of PowerPoint as outlined below.
1. Upload your PowerPoint presentation to OneDrive:
(a) Open the web version of MS Office
(b) Click on the waffle selector on the left and select OneDrive.
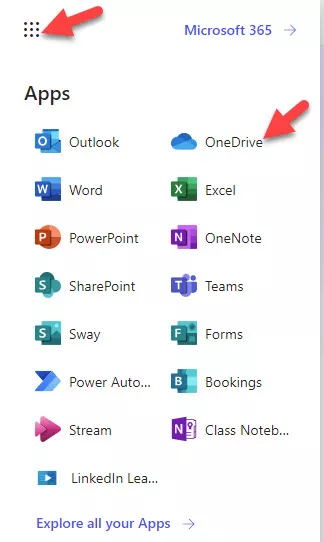
(c) Click Add New.
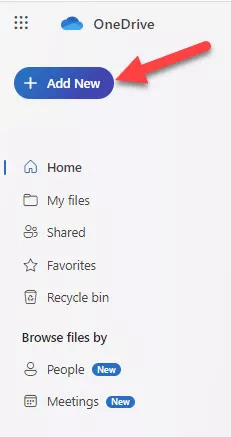
(d) Click Files Upload.
(e) Choose the file you wish to upload and click Open.
2. Click on the presentation file in OneDrive. It should open in the web version of PowerPoint. (If not, then use the waffle to select PowerPoint and open the file from there.)
3. Click File from the top left of the screen.
4. Click Share.
5. Click Embed.
6. Copy the embed code.
7. In Brightspace, click on the page where you want to embed the presentation.
8. Click Edit on the righthand side of the screen.
9. Click Insert Stuff in the toolbar.
10. Click Enter Embed Code and paste the code into the embed code field.
11. Click Next.
12. Click Insert.
Result
The presentation from OneDrive has now been embedded in the selected page.
Important: Remember you will need to give your class access to the powerpoint file by clicking Share with a Group when you are in OneDrive.
Upload your Presentation to Panopto and insert into a content page.
1. Convert the file to and Mpeg- 4 (mp4) format.
- Open your PowerPoint Presentation and on your File menu, select Save to ensure all your recent work has been saved in PowerPoint presentation format (.pptx).
- Click File > Export > Create a Video.
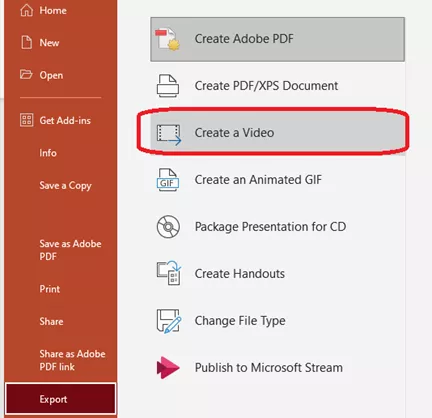
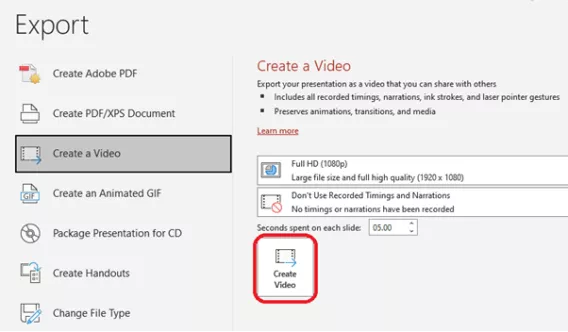
2. Select the option to Create Video
- Select the location to store the file and click Export.
3. Upload the Mpeg-4 (mp4) file to Panopto.
- Open your module on Brightspace.
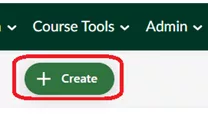
- Select Course Tools > Panopto.
- Click on the Create button.
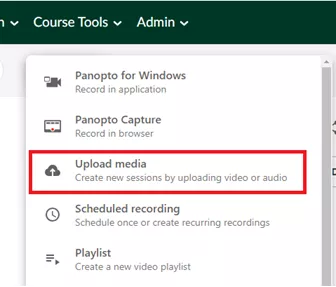
4. Select Upload media.
- Drag and drop your Mpeg-4 (mp4 file or click to find on your computer). It may take a few minutes to process.
5. Adding the MPEG4 file to the content area of your module on Brightspace.
Follow the steps here to add insert the Panopto recording to your content page
Note: If you also need to share the original PowerPoint Presentation with your students allowing them to download it follow the steps here