There are 3 overall steps to be take when creating private student blogs using Discussions,
Step 1: Create groups containing one single student
Step 2: View the Blogs in the discussion forums
Step 3: Add a link to the blogs in your Content
Step 1: Create groups containing one single student
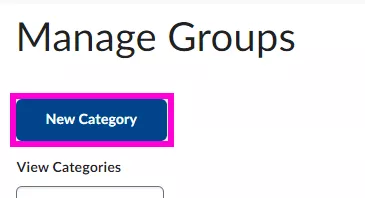
1. In the navbar, navigate to and click Groups.
2. Click New Category.
3. New Category page will open. Type a Category Name, something you will remember, such as 'Blogs'
4. Add an optional description.
5. Scroll down and click on the drop-down for Enrolment Type.
6. Select Single user, member-specific groups.
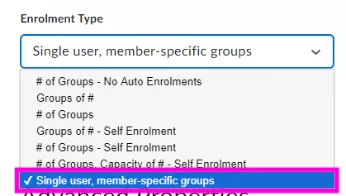
Note: This option will set up groups containing individual students. If you are setting up small groups where students can share blogs, you can choose anther enrolment type, such as Groups of #, where you would choose the group size.
7. Scroll down to the Additional Options area, and tick the box next to Set up discussion areas.
8. This will open a new option for you:
a. If you have already set up a forum for the blogs, choose that Forum from the drop down list.
b. If you have not yet set up a forum for the blogs, choose New Forum
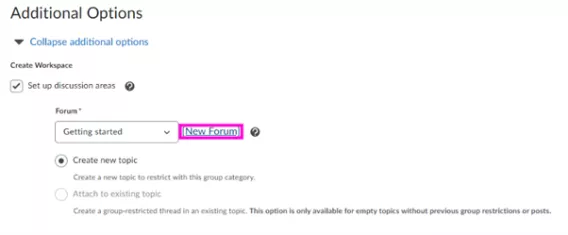
A new pop-up box will appear. Type in a Forum Title, which will make sense to you and your students, such as 'Blog'. Add an optional description, and click on Save, which will close the pop-up box.
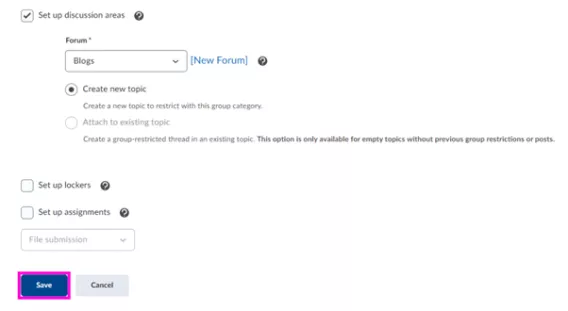
9. Scroll down and click Save.
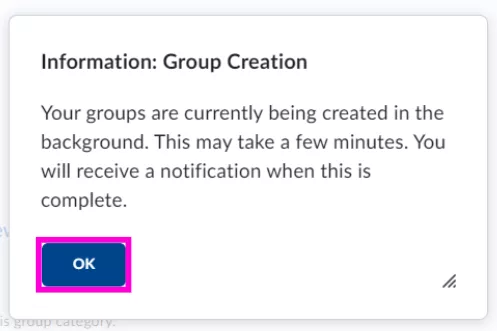
You will be notified that the groups are being created.
10. Click OK.
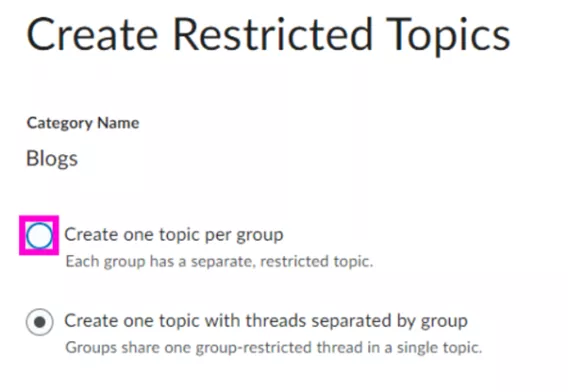
You are now taken to a new page, and asked to organise the discussion forums.
11. It is recommended that you choose Create one topic per group.
12. Click Create and Next.
13. Click Done.
Step 2: View the Blogs in the Discussion forums
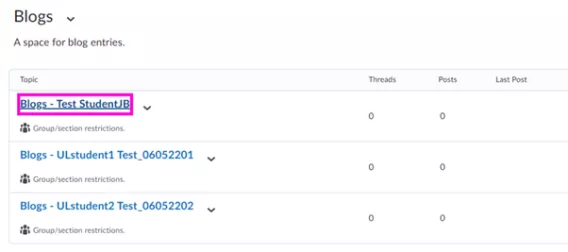
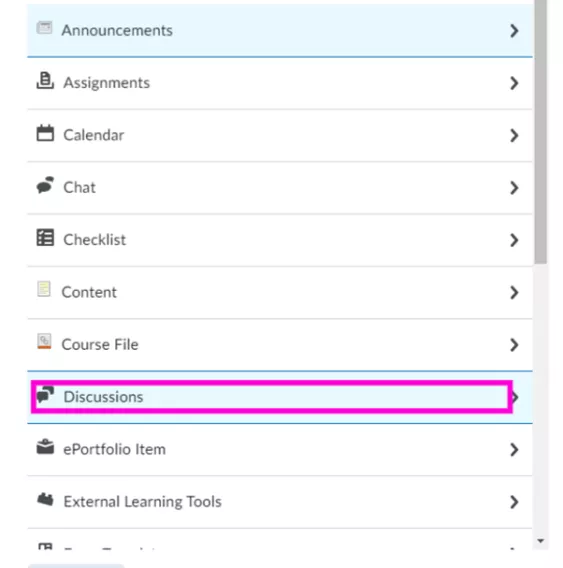
1. To view the Blogs in the discussion forums, navigate to, and click on Discussions.
2. Scroll down to find the Forum you just created. You will see a topic has been set up for each student.
Note: If you selected Single user, member-specific groups when setting up the groups, the students cannot see each others' blogs, but as an instructor you can view and comment on them all.
3. You can also view the Blogs under Groups in the navbar.
4. Select your blogs category in the drop down list for View Categories.
5. The individual student blogs are available in the Discussions column in the table of students.

6. You can click on the link in Discussions to the right of each student's name to access their blogs.
Step 3: Add a link to the blogs in your Content
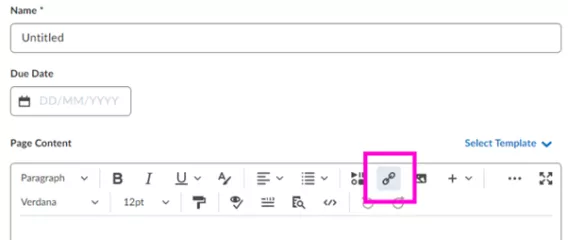
1. To add a link to your blogs in your Content, click on the week you want to add the link to.
2. Click on Create New on the right and choose HTML document.
3. To add a quicklink to your new page, click on the quicklink icon in the editor.
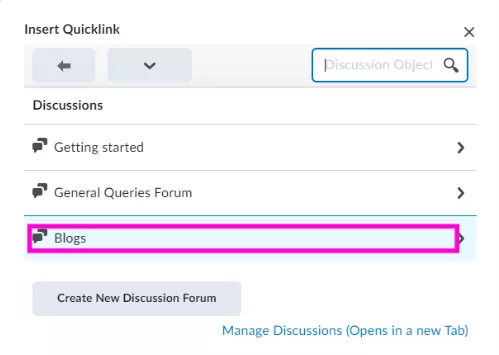
4. Click Discussions.
5. Click Blogs (or whatever you called your discussion forum).
6. Click on the + on the right of your Blogs Forum to select the whole Forum.
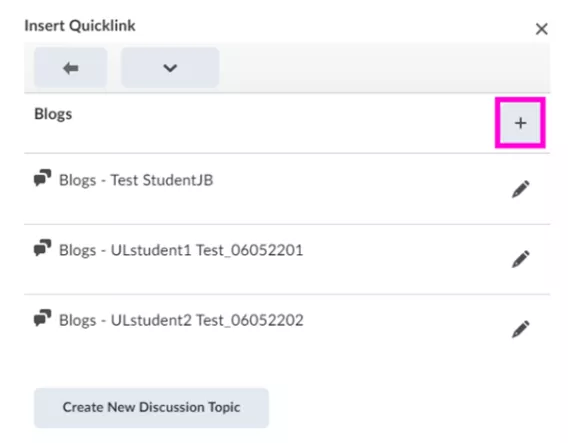
7. Click Insert.
8. New add a Name for your HTML file, add a due date (optional), and write out further instructions in the Page Content area for your students.
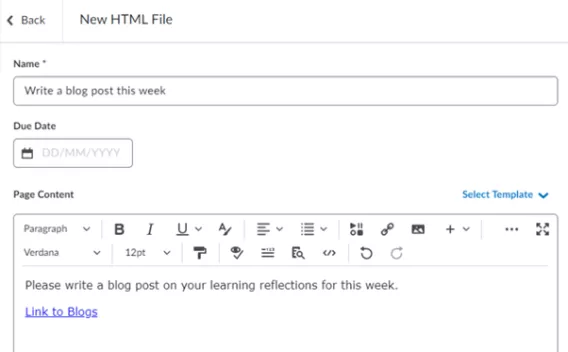
9. Click Save and Close.
Result
The private student blog has now been created.
Important: When you are ready for students to see this page, make sure you make the page visible.