Complete the following steps to set up an organization wide sharing group in the ePortfolio tool:
1. In the navbar, click Admin > Course Admin.
The Course Administration page opens.
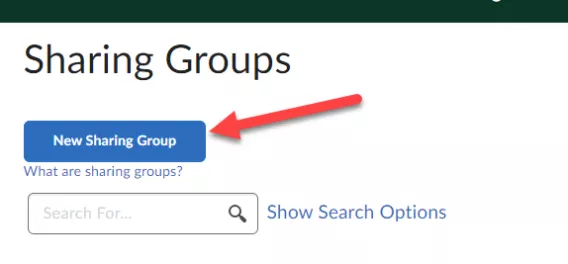
2. Under the Administration header, click Sharing Groups.

The Sharing Groups page opens.
3. Click New Sharing Group.
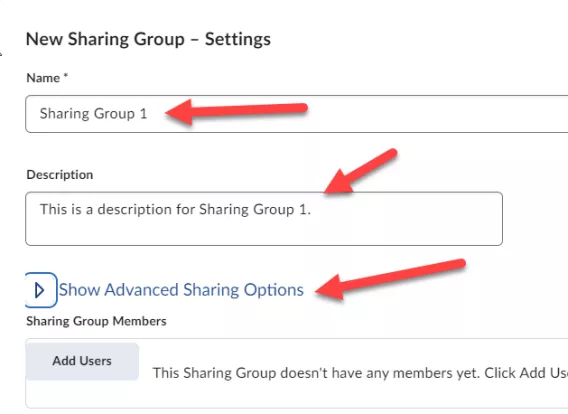
4. Give the profile a name and description.
5. Click Show Advanced Sharing Options.
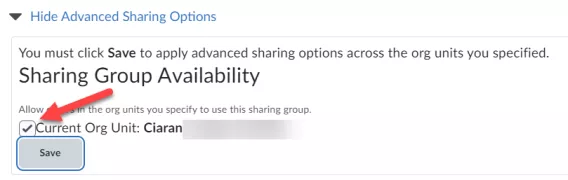
Optional: If you want to apply the group only to specific org units below the current org unit (rather than all org units), in the Sharing Group Availability section, clear the Current Org Unit check box. Click Add Org Units and select which org units you want to apply the profile to.
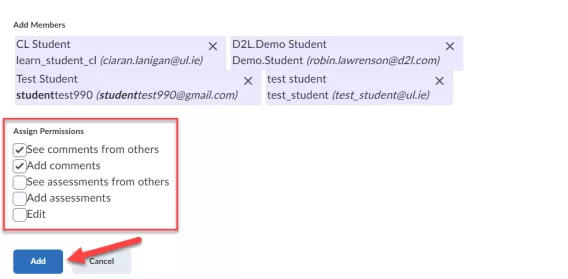
6. Click Add Users.

7. Browse for the users you want to add. Use the Search field to narrow your browsing results. Users with cascading roles must perform a search to display results.
8. To add users to the Selected Users list, click on users or groups of users in the browse listing. To remove users from the Selected Users list, click the Remove icon beside those users or groups of users you want to remove.
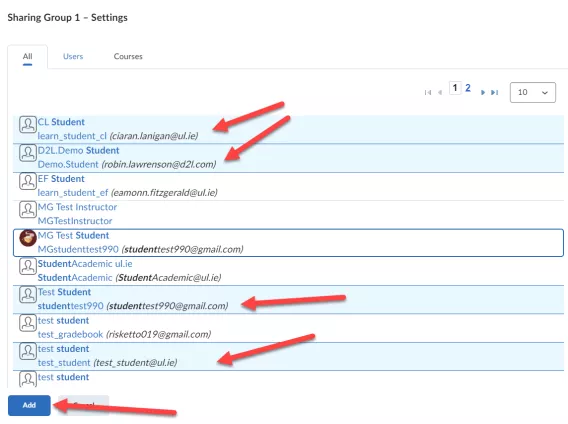
9. Scroll down to review the users you have selected.
10. Select the permissions you want the selected users to have.
11. Click Add.
12. Click Save and Close.
Result
The organization-wide sharing group has now been set up.
