By Michael Johnson.
Reading Time: ~3 mins.
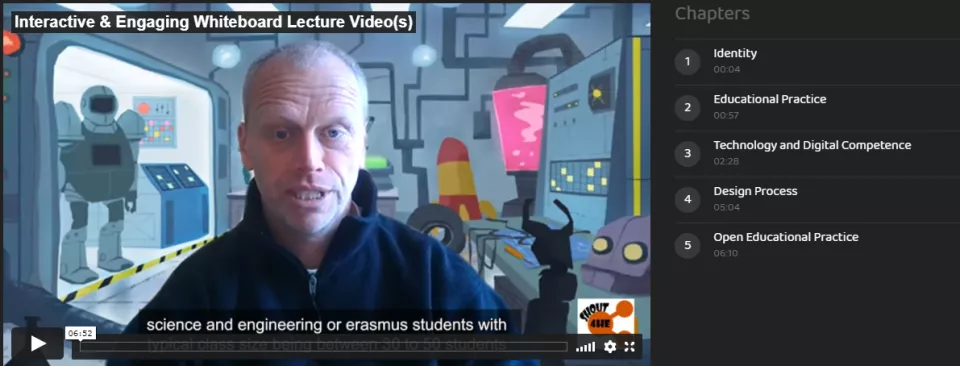
Featured Image Source: Screenshot of video by Michael Johnson on YouTube.
Note: A variety of tools and technology resources are referred to which are intended to place the focus on the pedagogical approach and the transferability of the educational practice to other contexts. This does not imply endorsement of tools used and UL staff who teach are encouraged to use supported tools when possible.
In this post:
Introduction
My name is Michael Johnson and I am a researcher/lecturer in the Department of Electronic and Computer Engineering here at the University of Limerick. In part 1 of this two-part blog post (part 2), I will discuss a teaching enhancement I experimented with during the past year in my teaching – introducing more interactivity into my recorded online lectures. My research areas range from robotics to sustainable electronics and I am currently teaching hardware and software engineering subjects. Most of the classes are undergraduate Science & Engineering or Erasmus students, with the typical class size being approximately 30 to 50 students per semester.
More Interactive Videos
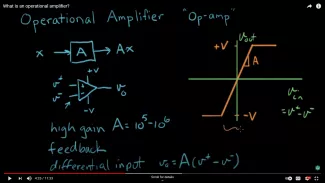
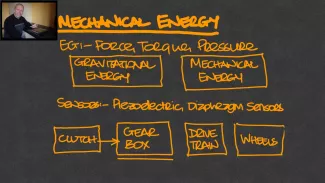
As part of the revised, asynchronous content delivery for a module last autumn, I decided to experiment with making the lecture video(s) more interactive and engaging for the student – along the lines of the Khan Academy YouTube videos (see this example) merged with the PiP (Picture-in-Picture) capability that you get with Panopto, MS-Teams, OBS (Open Broadcaster Software) and other video recording software.
See below images of an Interactive Online Tutorial Example from Khan Academy (left) and the Picture-in-picture video capability that my set up provided me (right).
At the start of the semester, I had made the conscious decision to deliver the course content asynchronously, pre-recording the lessons or lectures in a series of “bite sized” videos each week which the students could view and review in their own time over that week. In order to make the lessons more engaging and interesting for the student, I attempted to transcribe the engagement of a classroom “whiteboard” setting to this pre-recorded lecture space. For the student’s benefit, I have tried to keep each video as short as possible, typically between 5 – 15 minutes. This helps keep the student’s interest in and engagement with the subject topic.
Technology
The system uses a digital whiteboard application running on a tablet as the main replacement for the in-class board. Rather than importing the slides for the lectures and regurgitating them to the students, I took this opportunity to create new slides for the section or topic of discussion in that video. In this way, the students had the PowerPoint slides as a resource on the LMS and viewed the same content through the lens of the hand-written notes in the videos.
Using the whiteboard app, it was possible to interact with the slides in real-time on the video, adding in notes or comments, deleting or replacing values, highlighting sections of the text or showing worked examples and solutions to the student. In order to further enhance the interactivity and engagement level of the video, a small video overlay of me writing on the slide(s) in real time at the desk is shown to the student (the Picture-in-Picture component), so they can see the person behind the lesson as well as the lesson content.
A certain level of digital confidence and video editing proficiency was required to make the videos, as the whiteboard app recording and video overlay are separate video feeds which need to be synchronised and edited together later in order to realise the final, finished presentation. In the second part of this blog, I will go into more technical detail on the step-by-step process I used to make the final videos for the module.
I believe the videos present the students with a number of opportunities. By keeping the content short, it is easier to watch the videos. With the lecturer visible on the video and interacting with the presentation in “real time”, the video is more interesting and engaging for the student. This interaction allows the lecturer to focus in on whatever key points or sections they want to highlight in the video using the features of the whiteboard app. The finished product is a modular video which may be re-used across a number of different modules or lessons, if appropriate. However, the post-recording processing workload is significant for the lecturer and requires a certain familiarity with the tools or processes in order to be successful.
Reflection on the Process
Having an interest in all things technical and needing to re-design my lecture notes for online delivery provided the inspiration for undertaking this project. With the help of some peers who assisted me in choosing the hardware and software tools I would need for the project, I re-designed the course slides, recorded the lectures and post-processed them into their completed video format(s) week-on-week throughout the semester. While I found I have underestimated the workload involved in preparing 3-6 such videos a week over the course of the semester, I feel that the finished products are valuable learning aids and resources for the students, going forward. For the next revision of the slides, I intend to investigate if it is possible to remove the video post-processing step and achieve the same result in real-time when recording the video lessons.
Conclusion/Summary
I hope you have found this post to be some way interesting or useful. Part 2 of the post will go into more of the technical detail on the process I used to make the videos. I would be very interested to hear back from people on what they think of the video, as well as their thoughts, impressions and feedback. Feel free to get in touch with me by email, Michael.Johnson@ul.ie. The method is transferable to any other discipline or project with minimal changes – merely changing the course content presented on the digital whiteboard app. I look forward to hearing back from people interested in discussing the practice in greater detail.


