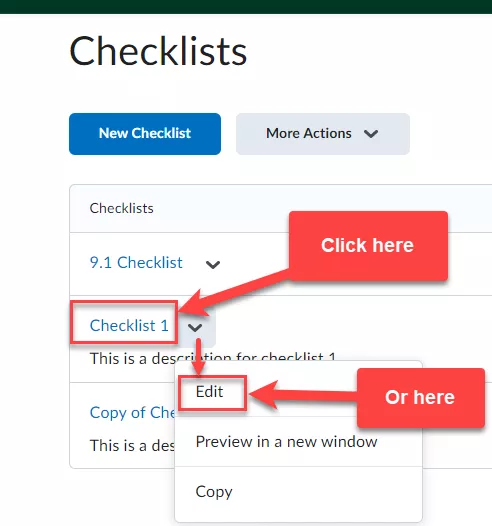
To edit a checklist in the Checklists page, complete the following steps:
1. Click on the checklist name.
Alternatively, click the arrow next to the checklist name, and from the drop down menu that appears, click Edit.
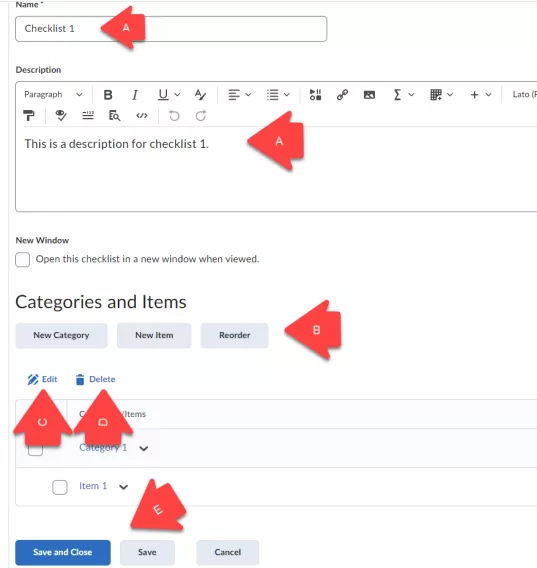
The Checklists content tab opens.
2. Make the necessary changes to the Checklist:
(a) Change the name and description of the checklist if needed.
(b) Use Categories and Items to:
- add new categories (New Category);
- add new items (New Item);
- change the order of the categories and/or the items in the checklist (Reorder).
(c) Edit existing individual categories and items by clicking on them. You can edit multiple items at the same time by selecting the desired items (or select all items by checking the box next to Categories/Items). Then click Edit. Now you can:
- change the names of items
- change the category they belong to
- set due dates
- change due dates
- indicate whether the due dates should or should not appear in the calendar
(d) Delete items and categories by selecting them and then clicking Delete.
(e) Click Save and Close.
Result
The changes have been saved and you have been returned to the Checklists homepage.